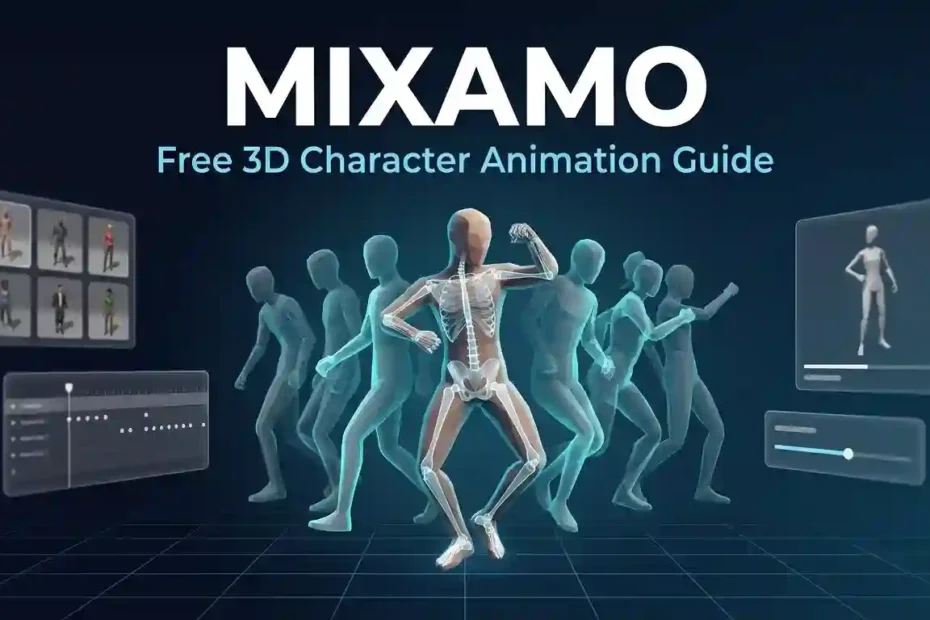
Rigging and animating a 3D character from scratch eats days — sometimes weeks. If you’re a solo dev or an indie team, that delay can kill a project before it ever ships. There’s a faster route. Mixamo gives you a library of ready-made characters, thousands of motion-captured animations, and an auto-rigger that animates your own models — all free, all in the browser. This guide walks through setup, rigging, animation, export, and getting the results into Unity, Unreal Engine, and Blender.
What Is Mixamo?
Mixamo is a free, browser-based 3D character animation platform owned by Adobe. You browse a library of pre-built, fully textured characters, or you upload your own model and let the auto-rigger build the skeleton for you. Then you apply motion-captured animations — walk cycles, dance moves, fight combos, idle poses — and download the result as an FBX file for your game engine or 3D software. In short, it’s the fastest free path from a static model to a character that moves.
There’s nothing to install. The whole workflow — browse, rig, animate, preview, export — happens in a web page. That’s why it became the default starting point for hobby animators, students, and indie studios for over a decade.
A small note on spelling: searches for “Maximo” or “Mixoko” usually land here. Both are common misspellings of the same Adobe platform, and this guide covers whichever way you typed the name.
A Short History: From 2009 Startup to Adobe Tool
The service launched in July 2009 as a lean web experiment: upload a character, get animated versions back, share the results. It raised roughly $12 million in early funding, and by 2010 it had added retargeting plus integrations that made it practical for real game and 3D workflows. Word of mouth did the rest — the combination of free, no install, and professional-quality motion capture made it a fixture in indie game development and 3D art education.
Adobe later acquired the platform, and it now sits under the Adobe umbrella alongside tools like Aero and Substance 3D. Under Adobe, it gained mobile-optimized rigging options, deeper connections to Adobe’s 3D and AR ecosystem, and a more refined auto-rigger. The core promise never changed: free access, browser-based, fast enough to use mid-project instead of at the start of one.
Who Is This For?
Short answer: anyone who needs a character to move and doesn’t have a motion capture studio on staff.
- Indie game developers. Your player controller and NPCs need a walk, a run, an idle, and maybe a death animation. You get all of them in one sitting, at zero cost, and the humanoid rig retargets across your whole cast.
- Animators and art directors. Prototype a scene, pitch a move, or test camera work before committing to hand keyframes. A mocap placeholder answers “does this beat work?” in minutes.
- Students and educators. Classes use it to teach skeletal animation fundamentals — bone hierarchy, root motion, blending — without paying for software or mocap studio time.
- VTubers and VR creators. Animated humanoid exports feed avatar pipelines, AR/VR apps, and live 3D video setups.
- Motion designers. A dance or fight clip can anchor a promo, a title sequence, or a social post without a studio shoot.
- Freelancers on deadlines. When the client needs a character standing up by Friday, this is the tool that gets it done.
If you’re building an AAA production with bespoke mocap, this is a prototyping and fill-in tool — not a replacement for your animation team. For everything else, it’s the most time-efficient option available.
Your First 30 Minutes: Getting Started
Here’s the exact order I follow when I need a character moving as fast as possible.
- Create a free account. Sign up at mixamo.com with an Adobe ID. If you already have one for Photoshop or any Adobe app, use it — no separate registration, no credit card.
- Pick a character. Open the Characters tab and filter by style: realistic, cartoon, fantasy, sci-fi. Click any avatar and it loads in the preview window in a T-pose.
- Try an animation. Switch to the Animations tab and search for “walk,” “idle,” or “dance.” Each clip previews live on your character, so you see exactly how the motion fits before you download anything.
- Download it. Hit Download and choose FBX with skin (you get the mesh, textures, rig, and animation in one file) at 30 FPS in a T-pose.
- Move the file into your project. Drag it into Unity, Unreal Engine, or Blender. Extract textures if your engine asks, set the rig to humanoid, and assign the clip.
- Press play. You should see your character moving within 15–20 minutes of starting.
Two habits that save pain later: keep a folder called characters and one called animations in every project, and name downloads with the character and clip name (e.g., Yuta_walk_30fps.fbx). When a project has 30 clips in it, you’ll thank yourself.
The Auto-Rigger, Explained
This is the feature that separates the platform from a plain asset store. You upload your own humanoid model, and the system builds the skeleton for you.
How it works, step by step:
- Export your character from Blender, Maya, or any DCC tool as FBX or OBJ.
- Upload it in the “My Characters” tab.
- The auto-rigger reads the mesh and asks you to place a handful of markers: head, hands, and feet.
- From those markers it generates a full humanoid skeleton, fitted to your model’s proportions.
- You can nudge individual bones before you confirm the rig, then hand the character over to any animation in the library.
There’s also a rig option optimized for mobile performance, which strips the skeleton down where your target hardware demands it.
The auto-rigger is fast, but it’s not magic. Upload quality decides everything. Rules that make it work:
- Humanoid only. Two arms, two legs, a head. Creatures, robots without human proportions, and four-legged models are out of scope.
- Clean T-pose. Arms straight out, feet flat, no crossed limbs. The marker step assumes a standard pose.
- Strip heavy textures. The rigger cares about geometry, not 4K maps. A lightweight untextured export rigs faster and avoids upload failures.
- Decimate before you upload. The service caps uploads by file size and polygon count. Drop a heavy mesh from a million polygons down to a few hundred thousand, rig it, and reapply your final textures in your engine afterward.
- Remove existing armatures. If your mesh already carries a skeleton, the rigger may reuse those bones instead of its standard set, and downstream tools (especially Unreal Engine retargeters) can fail to recognize the skeleton. Upload a static mesh instead.
When the preview rig looks right — no bent elbows at rest, feet on the floor, spine aligned — confirm it and move on. When it looks wrong, fix the markers rather than re-exporting; a 30-second marker adjustment beats another 5-minute upload cycle.
Five Animation Settings That Change Everything
Every clip in the library comes with a small control panel. Most people ignore it and wonder why their character floats or slides. Here are the settings that matter, in the order you should touch them.
- Loop. Turn it on for anything that repeats: walk cycles, jogs, idles, breathing. Turn it off for one-shot moves: punches, jumps, pickups. A looping punch looks robotic; a non-looping idle pops at the seam.
- In Place. When it’s on, the character performs the motion where it stands — ideal for in-engine locomotion where your game code drives movement. When it’s off, the clip carries root motion: the character actually travels through space, which is perfect for cinematic shots and Blender work.
- Overdrive. A percentage slider that pushes the energy of a clip. A 100% overdrive on a dance or a fight combo turns a casual motion into a big, exaggerated performance. Start at 0 and raise it only when a move feels flat.
- Arm Spacing. Widens or narrows how far the arms swing. Helpful when a clip’s arm motion clips through a backpack, a weapon, or a wide coat.
- Foot Lock. Available on supported clips, it anchors the feet to the ground and kills the sliding that some mocap transfers leave behind, especially on uneven terrain.
One rule beats all of them: trust the preview. What you see playing on your character is the file you get. If the clip reads well in the browser preview, it reads well in the engine. If something feels off, fix it here — the settings are free, and re-importing into the engine is not.
Export Formats and Download Settings, Explained
The download dialog is small, but it’s the most consequential part of the workflow. Get the settings right and your file imports cleanly; get them wrong and you debug import errors for an hour.
Here’s what each option means in practice:
- Format: FBX — the universal choice. Unity, Unreal Engine, Blender, and Maya all read it natively, with the rig and animation baked inside.
- Format: C4D — for Cinema 4D pipelines and motion graphics work.
- Format: DAE (Collada) — for older tools and some AR/VR pipelines that prefer it.
Everything else in the dialog is a switch:
| Setting | Your Choices | When to Pick It |
|---|---|---|
| Skin | With Skin / Without Skin | With Skin = full character (mesh + textures + rig + animation). Without Skin = animation only, small file — use it when you already have the character in your project. |
| Pose | T-Pose / A-Pose | T-Pose is the safe default and matches most engine importers. A-Pose is fine for stylized characters, but keep it consistent across your whole asset set. |
| Frame rate | 10 / 20 / 30 / 60 FPS | 30 FPS is the sweet spot for games. 60 FPS for fast fight or dance clips where smoothness matters. 20 FPS only to shrink file size. |
| Keyframe reduction | None / Normal / High | None keeps every frame exactly as previewed. Normal trims redundant keys and is usually safe. High gives the smallest file but can soften fast motion. |
| Uniform scale | On / Off | Leave it on unless your engine demands a specific unit scale; it keeps the character at a consistent real-world size. |
A practical default set for game development: FBX, With Skin, T-Pose, 30 FPS, keyframe reduction None, uniform scale on. For animations-only downloads, switch skin to Without Skin and the file drops from hundreds of megabytes to a few.
Getting Your Character into Unity
Unity’s Humanoid animation system is what makes this whole workflow pay off. Any humanoid clip retargets onto any humanoid character, so one set of downloads can drive your entire cast.
The workflow, tested and repeatable:
- Import the character FBX. Drag it into your Assets folder. On the Rig tab, set Animation Type to Humanoid and click Create Avatar, then Apply.
- Extract textures. The textures are embedded in the FBX. Select the model, open the Materials tab, and click Extract Textures into a folder. Unity then rebuilds the materials from those textures.
- Import the animation. Download clips with Without Skin, drag them in, and on the Animation tab enable Loop Time for looping clips. For root motion, enable Bake Into Pose for root rotation and position.
- Build the Animator. Create an Animator Controller, add your clips as states, and draw transitions between idle, walk, and run.
- Attach and play. Add the Animator component to your character, assign the controller and avatar, and hit play.
Because everything is Humanoid-typed, you can drop your protagonist’s dance clip onto a 30% larger guard and it still fits — Unity maps the motion from bone to bone. That retargeting is the single biggest time-saver in the whole stack, and it’s covered in Unity’s official animation documentation.
Getting Your Character into Unreal Engine
Unreal’s pipeline is slightly more formal, but just as fast once you know the two rules: import the character first, then import animations onto that same skeleton.
- Download the character with no animation selected: FBX, T-pose, with skin.
- Import the FBX into the Content Browser. Enable Import Skeletal Meshes, and leave the Skeleton field at None so the engine builds a skeleton that matches the imported mesh exactly.
- Download the animations with Without Skin, and import each one with your new skeleton selected. The clips land ready to play on the character.
- Retarget when needed. To move these motions onto the UE5 mannequins (Manny and Quinn) or a MetaHuman, Epic’s documented animation retargeting workflow uses IK Rigs and the IK Retargeter: you describe the source skeleton, describe the target, and the editor computes the mapped animation. This covers both directions — engine clips onto your imported character, and imported clips onto engine characters.
- Add root motion where gameplay needs it. UE5’s retargeting pipeline also supports converting motion into root motion setups, so a run cycle can actually drive the character controller.
The one trap: if the rigger reused an existing armature instead of its standard skeleton, the imported bone names won’t match what Unreal’s retargeters expect, and the retarget option stays locked. Fix it at the source — upload a clean static mesh so the standard skeleton gets applied.
The Blender Route
Blender gives you the most control, and two routes get you there.
Route 1 — the official add-on. Adobe ships a Blender add-on for the auto-rigged characters. It builds an IK control rig on top of the character in one click and lets you bake animations in and out of that control rig, which is the best way to edit a clip frame by frame or add a custom move on top of a mocap base. The original build targets Blender 3.6; on newer Blender versions the community “Mixamo Rig” extension provides the same control-rig and bake workflow, since Blender 4.0 replaced bone layers with bone collections and broke the original.
Route 2 — manual FBX import. Works on every Blender version:
- Import the FBX. Blender often reads it at 0.01 scale — reset the object scale to 1.0 and apply it.
- Find the armature. These skeletons carry bone names with the
mixamorig:prefix. If another tool can’t see those bones, rename the hierarchy to plain names in one pass. - Keep one armature per file. Blender and most exporters prefer a single-rig file; split your character and animations into separate files.
- Bake what you change. After editing keyframes, bake the animation and re-export as FBX with the armature and mesh included.
For most people I recommend the add-on or extension for rig and edit work, and manual import when you want zero dependencies. Either way, Blender is where you’ll go when a clip needs a tweak the browser controls can’t make.
Mixamo vs the Alternatives: Which Tool Fits Your Project?
No tool is the whole answer, so here’s an honest map of the landscape. The comparison table keeps the categories consistent: cost, rigging, animation source, and best use.
| Tool | Cost | Rigging | Animation Library | Best For |
|---|---|---|---|---|
| Mixamo | Free (Adobe ID) | Automatic humanoid auto-rigger | Thousands of professional mocap clips | Games, prototyping, education, fast production fills |
| Ready Player Me | Free tier + paid | Pre-rigged customizable web avatars | Small built-in set | Web avatars, social apps, lightweight games |
| Cascadeur | Paid (free trial) | You supply the rig | AI-assisted original animation authoring | Cinematic, original moves that don’t exist in a library |
| Blender | Free (open source) | Manual or add-on rigging | You create every clip | Full creative control, one-off custom animation |
| Character Creator 4 | Paid | Auto-rig with deep custom parameters | Modest built-in clips | Stylized, heavily customized characters for film and games |
Where the free Adobe platform wins: speed, cost, and the sheer size of a mocap library backed by professional motion actors. Where it loses: facial and viseme animation (it’s a body-focused tool), frame-by-frame authoring (the browser only exposes clip settings, not a keyframe editor), and non-humanoid characters. For those gaps, pair it with a DCC like Blender for edits, or a tool like Cascadeur when you need a move that’s genuinely original. That combination — free mocap base plus targeted hand-crafted fixes — is how most indie teams actually ship.
Limits and Workarounds
Every honest review says the same thing: this is a body-animation engine, not a full DCC. Know the walls before you hit them.
- Humanoid only. The auto-rigger and the whole clip library assume a human body plan. A dragon, a robot with three arms, or a stylized creature can’t be rigged here.
- No face. There’s no facial rig, no visemes, no lip sync. If your project needs talking heads, that’s a separate pipeline.
- Upload caps. File size and polygon count are limited. Heavy characters with 4K textures and a million polygons get rejected at the door.
- File bloat is real. One character with embedded 4K textures has hit ~105 MB as an FBX. Re-export from Blender after import to strip the bloat if file size matters to your pipeline.
- No keyframe editor in the browser. You adjust clip settings, not individual frames. For frame-level work, export and edit in Blender or your DCC of choice.
When something breaks, it’s usually one of these six:
| Problem | Why It Happens | The Fix |
|---|---|---|
| Upload gets rejected | File size or polygon count over the cap | Decimate the mesh, strip textures, and upload a lightweight version |
| Markers land in wrong places | Odd proportions or a non-T-pose model | Reposition markers manually, or re-export a cleaner T-pose mesh |
| Character slides while walking | Clip carries root motion into the ground contact | Use the In Place version of the clip, or enable Foot Lock where available |
| Character imports at 0.01 scale in Blender | FBX unit conversion | Reset object scale to 1.0 and apply the transform |
| Missing textures in Unity | Textures are embedded in the FBX, not extracted | Select the model, Materials tab, Extract Textures |
| UE retarget option greyed out | Skeleton names don’t match the standard set | Upload a static mesh (no armature) so the standard skeleton is applied |
Ninety percent of “it’s broken” reports are one of these six rows. Check the table before you check the forums.
Pricing and Licensing: What’s Free, What’s Allowed
The price is zero. Sign up with a free Adobe ID, and characters, auto-rigging, animations, and downloads are all included. There’s no subscription tier, no watermarked export, and no per-download meter.
The licensing is where people get anxious, so here’s the practical picture. The characters and animations are royalty-free for personal, academic, and commercial projects — games that make money on the store, films, client work, YouTube. Credit is not required, though it’s always welcome. The one firm restriction: you can’t resell the raw files as standalone assets. If someone can extract a bare character file from what you ship and sell it on an asset marketplace, that’s competing with the platform, and it’s not allowed.
| You Can | You Can’t |
|---|---|
| Use characters and clips in commercial games, films, and client work | Resell or redistribute the raw character/animation files as standalone assets |
| Modify, retexture, and extend the models in your own pipeline | Sell the assets on marketplaces as if they were your own content |
| Skip attribution (it’s optional, not required) | Build a competing animation store on top of the clip library |
| Use clips in monetized videos, streams, and VTuber setups | — |
Licensing details can be updated by Adobe, so skim the current terms on the official site before you launch something big. For the vast majority of projects — including profitable ones — you’re in the clear.
Frequently Asked Questions
Is Mixamo free to use?
Yes — completely. Mixamo costs nothing: characters, auto-rigging, the full animation library, and all downloads are free with an Adobe ID. Adobe monetizes through its wider 3D product lineup, not through this platform, so there’s no premium tier and no paywalled clip.
What is Mixamo used for?
Mostly for getting humanoid characters moving fast: game NPCs and player controllers, film and animation prototyping, VR/AR experiences, VTuber avatars, motion graphics, and classroom work on skeletal animation. Anywhere a project needs a walk, an idle, or a fight move without a motion capture studio, Mixamo is the default free answer.
What formats does Mixamo export?
Three: FBX (with or without skin), C4D, and Collada (.dae). FBX is the right pick for nearly everyone — Unity, Unreal Engine, and Blender all import it with the rig and animation intact. Use Without Skin when you only need the animation on a character you already own.
Can I use Mixamo in commercial projects?
Yes. The characters and animations are royalty-free for personal and commercial work, and attribution is optional. The only real restriction is reselling the raw files as standalone assets — embed them in your game, film, or product and you’re covered. Check Adobe’s current terms before a large launch, just to be safe.
Why does my Mixamo rig look wrong?
Almost always it’s one of four things: markers placed on the wrong spots, a model with unusual proportions, an existing armature interfering with the auto-rigger, or a messy mesh with separate hair and clothing parts. Re-export a clean T-pose static mesh, place the markers deliberately, and the preview rig usually settles on the second attempt.
Does Mixamo work with Blender?
Yes, and it’s one of the most popular pairings. Adobe ships an official Blender add-on (built for Blender 3.6) that adds an IK control rig and bake-in/bake-out workflow for auto-rigged characters. On Blender 4.x and later, use the community Mixamo Rig extension or the manual FBX import — both routes are covered above.
Your Move
Here’s your homework, and it takes less time than re-reading this page: open a new project, pull one character, grab a Walk and an Idle clip, and get both moving in your engine before you close this tab. Fifteen minutes, tops.
Once your character is walking, everything else stops being a production problem and becomes a download-and-tweak loop. Fight combos for your combat prototype, dance numbers for your showcase reel, an entire NPC cast for your next level — all of it is one tab away. That shift from weeks of rigging to minutes of picking is the entire point of the platform, and it’s the reason it’s survived over a decade of 3D tools coming and going.
Go move a character today. And if you hit one of the snags in the troubleshooting table, drop it in the comments with your setup — every fix that gets documented there makes the next person’s first day faster.