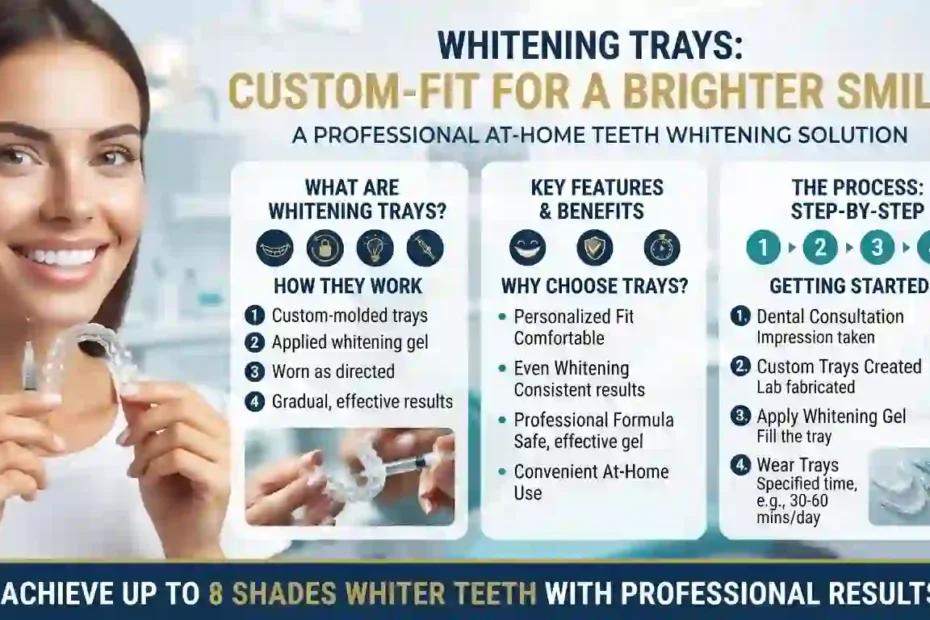
A whitening tray is a thin, mouth-shaped shell that holds bleaching gel directly against your teeth for a set period. The gel does the real work. The tray just keeps it in place and off your gums.
Nearly all tray gels use one of two active ingredients: carbamide peroxide or hydrogen peroxide. Carbamide peroxide breaks down slowly and releases roughly one-third of its content as hydrogen peroxide, the oxidizing agent that dissolves stain molecules inside enamel and dentin. That slow release is why carbamide peroxide suits overnight wear, while hydrogen peroxide gels peak fast and suit short daytime sessions.
Three things decide your outcome:
- Fit — a snug tray keeps gel on enamel instead of gum tissue.
- Contact time — more hours with a weak gel often beats fewer hours with a strong one.
- Stain type — surface stains from coffee or tea lift easily. Age-related yellowing and tetracycline stains take far longer.
Do Whitening Trays Actually Whiten Teeth?
Yes, and the evidence behind them is stronger than the evidence behind most drugstore alternatives.
A systematic review of randomized controlled trials compared over-the-counter whitening strips with the ADA-recommended home technique: 10% carbamide peroxide gel in a tray, worn daily for two weeks. The authors found similar color change overall, but they reported more gum irritation with the tray method and concluded there is no sound evidence that strips should replace the tray technique (Serraglio et al., 2015).
That gum-irritation finding matters more than it first appears. Irritation came from gel touching tissue, not from the peroxide itself. Better fit means fewer side effects, which is the single strongest argument for custom-molded trays over generic ones.
What trays handle well:
- Yellow and brown surface stains from coffee, tea, red wine, and tobacco
- Age-related darkening as enamel thins and dentin shows through
- Mild intrinsic discoloration
- Long-term maintenance after in-office bleaching
What trays handle poorly:
- Crowns, veneers, bonding, and fillings — only natural tooth structure changes color
- Gray tetracycline banding, which may need three to four months of nightly wear
- White fluorosis spots, which can look more obvious as surrounding enamel lightens
The American Dental Association makes the same point in plain terms: whitening works on both extrinsic and intrinsic stains, but tooth-colored restorations stay exactly the shade they are (ADA Oral Health Topics).
What Are the Different Types of Whitening Trays?
Five formats dominate the market. Each trades fit for price.
1. Custom dentist-made trays
A dental office takes an impression or an intraoral scan and fabricates a vacuum-formed tray from your exact anatomy. Fit is the best available, gel waste is minimal, and the same trays last for years of touch-ups. Cost runs highest, usually $300 to $600 including gel.
2. Boil-and-bite trays
You soften the shell in hot water, bite down, and let it set around your teeth. Fit lands between “decent” and “disappointing.” Most people get usable results for one to two whitening cycles.
3. Universal one-size trays
Stiff pre-shaped shells with no molding step. These leak the most gel and deliver the least even coverage. Best treated as a short-term trial, not a treatment plan.
4. Prefilled disposable trays
Gel comes sealed inside single-use trays, often at lower peroxide concentrations. Convenient and mess-free, but the fit is generic and you pay more per whitening session over time.
5. LED tray systems
A universal or molded tray with a built-in blue light. The light adds convenience and a visual cue, yet the color change still comes from the peroxide gel, not the lamp.
Comparison Table: Custom Trays vs Boil-and-Bite vs Prefilled vs Strips
| Feature | Custom dental tray | Boil-and-bite | Prefilled disposable | Whitening strips |
|---|---|---|---|---|
| Fit quality | Excellent, tooth-by-tooth | Moderate | Poor | Poor, flat surface only |
| Typical gel strength | 10% to 22% carbamide peroxide | 10% to 35% carbamide peroxide | 6% to 10% hydrogen peroxide | 6% to 10% hydrogen peroxide |
| Wear time per session | 30 min to overnight | 30 min to overnight | 20 to 60 min | 30 to 60 min |
| Time to visible change | 3 to 7 days | 5 to 10 days | 7 to 14 days | 5 to 14 days |
| Gel waste | Very low | Moderate | None, but dose is fixed | None, but coverage is partial |
| Gum irritation risk | Lowest | Moderate | Moderate to high | Low to moderate |
| Reusable | Yes, 1 to 3 years | Yes, weeks to months | No | No |
| Typical cost | $300 to $600 with gel | $20 to $80 per kit | $30 to $90 per kit | $25 to $65 per box |
| Best for | Even, lasting results and repeat touch-ups | First-time users on a budget | Travel and short routines | Mild surface stains |
Which Whitening Gel Strength Should You Choose?
Strength is a trade-off between speed and comfort, not a straight quality scale.
10% carbamide peroxide is the concentration with the deepest evidence base for at-home use with trays. It equals roughly 3.6% hydrogen peroxide. Most people wear it overnight or for several hours, and it produces the mildest sensitivity of the common options.
16% carbamide peroxide works well for daytime wear in one- to two-hour sessions. It suits people who cannot tolerate a tray while sleeping.
22% carbamide peroxide delivers faster visible change and a higher chance of temporary sensitivity. Dentists typically recommend it for one hour daily rather than overnight, or for every-other-day use in sensitive mouths.
Hydrogen peroxide gels (6% to 10%) release their oxidizing power within 30 to 60 minutes, which makes them a fit for prefilled trays and short sessions.
One pattern from clinical research deserves repeating: different concentrations often reach similar final shades. Weaker gels simply take more sessions. If you have sensitive teeth, going lower and slower usually ends at the same destination with far less discomfort.
Step-by-Step: How to Use Your Whitening Tray Correctly
Follow this sequence and you avoid the three mistakes that ruin most at-home whitening attempts.
- Get an exam first. Whitening will not fix a cavity, cracked tooth, or exposed root. It can make those problems hurt.
- Brush and floss. Clean enamel lets gel reach the stain. Skip this and you waste a session on plaque.
- Dry your teeth with a tissue or gauze. Wet teeth dilute gel and shorten its working time.
- Load the tray. Place a thin line of gel, about the size of a grain of rice, on the inner front surface of each tooth position. More gel does not whiten faster. It overflows onto gums.
- Seat the tray from the front teeth backward, then press gently with your fingers to spread the gel evenly.
- Wipe away overflow with a damp finger or soft brush. This one step prevents most gum whitening and irritation.
- Wear for the labeled time. Do not exceed it. Longer wear does not mean more whitening; it means more sensitivity.
- Rinse and brush the tray with cool water and a soft brush. Never use hot water on a molded tray — heat warps it.
- Air-dry completely and store in a vented case. Trapped moisture breeds bacteria.
- Track your shade with a photo taken in the same lighting every three days. Progress feels slow day to day and obvious in a two-week comparison.
How Long Should You Wear Whitening Trays?
Wear time depends on the active ingredient and its concentration.
| Gel | Typical wear time | Notes |
|---|---|---|
| 10% carbamide peroxide | 4 to 8 hours or overnight | Slowest release, mildest feel |
| 16% carbamide peroxide | 2 to 4 hours | Good daytime option |
| 22% carbamide peroxide | 1 hour, once daily | Faster results, more sensitivity |
| 6% to 10% hydrogen peroxide | 30 to 60 minutes | Peaks quickly, do not extend |
Full courses usually run one to two weeks. Tetracycline or gray banding may need three to four months of nightly wear, and some cases never reach an even shade without veneers.
If you feel zingers or cold sensitivity, cut wear time in half before you cut the course short. Every-other-day use keeps results moving while nerves calm down.
How to Prevent Tooth Sensitivity and Gum Irritation
Sensitivity is the most common side effect of tray whitening, and it is almost always temporary. Clinical data puts tooth sensitivity in roughly half of at-home users and gum irritation in about 14% to 32%, with most symptoms fading within 24 hours to seven days after stopping.
Practical fixes that work:
- Switch to a desensitizing toothpaste with potassium nitrate two weeks before you start.
- Ask for a gel with a desensitizer built in, such as potassium nitrate or fluoride.
- Reduce gel load, not wear time, first. A thinner line means less overflow.
- Skip a day when sensitivity spikes, then resume.
- Use a lower concentration for the same total number of hours.
- Protect your gums by wiping overflow and checking tray margins in a mirror.
- Pause whitening if you have active gum inflammation, recession, or a recent filling.
Avoid whitening during pregnancy and breastfeeding as a precaution, since peroxide gels have not been studied in those groups.
Are Whitening Trays Safe for Your Enamel?
Used as directed, yes. Misused, they carry real risk.
Peroxide reaches the pulp within about 15 minutes of exposure, which sounds alarming. Research on 10% carbamide peroxide finds a mild, temporary pulp response with no evidence of lasting damage. The ADA lists temporary tooth sensitivity and gingival inflammation as the most common adverse effects of vital tooth whitening — notable for being temporary (ADA).
Where people get hurt is the gray market and the shortcuts:
- Unlabeled gels above 35% peroxide sold online
- Boiling trays so hot they warp and cut gum tissue
- Wearing trays for days on end to “catch up”
- DIY charcoal, baking soda, or lemon juice scrubs that abrade enamel instead of bleaching it
- Whitening over crowns and expecting a color match
Two mechanical cautions worth knowing: bleaching can slightly alter enamel surface roughness, and it can reduce bond strength if you get composite or ceramic work soon after. Tell your dentist if you whitened in the past two weeks before any bonding, veneer, or filling procedure.
Whitening Trays vs Strips vs In-Office Bleaching
| Criteria | Whitening trays | Whitening strips | In-office bleaching |
|---|---|---|---|
| Shade change per session | Gradual, cumulative | Gradual | Large, immediate |
| Total treatment time | 1 to 2 weeks | 1 to 2 weeks | 1 to 2 visits |
| Evenness on crooked teeth | Very good | Poor, strips miss overlaps | Very good |
| Sensitivity profile | Mild to moderate | Mild to moderate | Moderate to high, short-lived |
| Cost | $300 to $600 | $25 to $65 | $500 to $1,000+ |
| Long-term touch-ups | Cheap, reuse the same trays | Buy a new box each time | Pay for another visit |
| Best candidate | Anyone wanting control and even results | Mild staining, low budget | Event deadline or heavy staining |
A smart hybrid exists: in-office bleaching for the jump, then custom trays for maintenance once or twice a month. That combination holds a bright shade longer than either approach alone.
What to Look for When Buying Whitening Trays
Check these six points before you pay.
- Labeled concentration. If the gel strength is missing or vague, walk away.
- ADA Seal of Acceptance. A voluntary program, but products carrying it have documented safety and effectiveness data behind the label claims.
- Tray material. Soft, flexible thermoplastic seals better than rigid plastic, and thin material feels less bulky.
- Vent or reservoir design. Some trays leave space at the incisal edge to reduce overflow.
- Gel volume and refill availability. Refills should cost far less than the starter kit.
- Storage case with drainage. Sealed damp cases cause odor and bacterial growth.
Skip any product that promises overnight shade changes, contains abrasives instead of peroxide, or ships with no usage limits. Also check whether replacement whitening trays are sold separately for that brand, since reusing a shell you already own cuts your long-term cost in half.
How Much Do Whitening Trays Cost in 2026?
Realistic price ranges:
- Prefilled disposable trays: $30 to $90 per kit, about 7 to 14 sessions
- Boil-and-bite kits: $20 to $80, plus $10 to $25 per gel refill
- Custom trays from a dentist: $300 to $600 including a gel supply
- Refill gel for existing custom trays: $25 to $60 per syringe set
- In-office whitening: $500 to $1,000 per visit
Cost per shade change favors custom trays for repeat users. You pay once for the shell, then only for gel. If you whiten twice a year, custom trays typically break even against drugstore kits within three to four cycles.
How to Keep Your Teeth White After Treatment
Whitening is maintenance work, not a one-time purchase.
- Rinse with water right after coffee, tea, or red wine.
- Use a straw for dark cold drinks.
- Brush twice daily for two minutes with an ADA-accepted whitening toothpaste.
- Clean between teeth once a day — interdental stains read as overall yellowing.
- Limit tobacco entirely.
- Do a one-night tray touch-up every four to eight weeks.
- Book a professional cleaning every six months to strip surface stain before it sets.
Results generally hold six months to a few years, depending on diet, smoking, and hygiene habits. Keeping your whitening trays clean and dry is what makes those touch-ups painless — a warped or bacteria-laden shell turns a five-minute routine into something you avoid.
Talk to a Dentist Before Whitening If Any of These Apply
Book a checkup first if any of these apply to you:
- Crowns, veneers, bonding, or tooth-colored fillings in the front teeth
- Gum recession, exposed roots, or active periodontal disease
- Cavities, cracked teeth, or recent dental work
- A history of strong sensitivity or a dead tooth that has darkened
- Pregnancy or breastfeeding
- Age under 18 — full-arch cosmetic bleaching is discouraged in mixed or primary dentition
- Enamel defects, fluorosis, or gray tetracycline staining
The ADA and consumer guidance from MouthHealthy both push people toward a conversation with their dentist before starting any bleaching product, mostly because the exam reveals problems whitening cannot solve and can worsen (MouthHealthy).
Common Mistakes That Waste Your Tray Sessions
- Overfilling the tray and flooding your gums
- Wearing longer than directed to speed things up
- Skipping the dry-teeth step
- Storing trays wet in a closed case
- Whitening over restorations and expecting a match
- Quitting at day four because the change is subtle
- Boiling a molded tray and warping the fit
- Sharing one set of whitening trays between two people
- Using the same tray for upper and lower arches
Frequently Asked Questions About Whitening Trays
Q: How long does it take for whitening trays to work?
Most people see a visible change in three to seven days with daily wear, and full results in one to two weeks. Stubborn gray or tetracycline staining can take three to four months of nightly use.
Q: Can I sleep with a whitening tray in my mouth?
Yes, with a 10% carbamide peroxide gel in a well-fitting tray, since it releases peroxide slowly. Higher concentrations such as 22% should be worn for about an hour while awake to limit sensitivity.
Q: Are whitening trays better than whitening strips?
Trays win on evenness and total gel contact, especially for crooked or crowded teeth. Strips win on convenience and lower upfront cost. A systematic review of trials found similar color change between the two, with more gum irritation from trays when fit is poor.
Q: Do bleaching trays damage enamel?
Used at labeled strength and wear time, they do not cause lasting enamel damage. Abrasive DIY pastes, excessive wear, and unlabeled high-concentration gels are what harm teeth.
Q: Why do my gums turn white when I wear a tray?
That is a mild chemical burn from peroxide sitting on soft tissue, not on enamel. Wipe away overflow, load less gel, and the whiteness fades within an hour or two.
Q: Can I use whitening trays if I have crowns or veneers?
You can, but only your natural teeth will lighten. Whitening first and then matching new restorations to the brighter shade is the correct order.
Get the Brighter Smile You Actually Paid For
Whitening trays reward patience and precision. Buy a tray that fits, use the gel strength your mouth tolerates, wipe the overflow, and give it two full weeks before you judge the result.
If your teeth have crowns, recession, or a history of sharp sensitivity, book a quick exam and let a dentist size the gel strength for you. That fifteen-minute conversation saves most people a month of stinging, patchy, wasted effort — and it is the difference between a tray that sits in a drawer and one that delivers a genuinely brighter smile.